For those of
you who need great homemade gift ideas or plans for a fun girl’s night, here
are a few great ideas! Every girl I know loves beauty products. First of all, they make fantastic gifts for any girl. Secondly, we always need them! And thirdly, they are so dang cute! Man, are we
suckers for them! We will pay 15 bucks for a small bottle of lotion! I would
hate to add up all of the money I’ve spent on beauty products, especially
chapstick. Right, Shardi? I picked some fun and easy-enough recipes for you
guys to make your own stuff, whether it’s for yourself or someone else. How cute are they?! You can
even tweek them a little bit, however you want…add some orange zest to your
lemon…be creative!! I can’t wait to see how these turn out for me & for you
as well! Love it!
Lemon Salt Scrub
This first tutorial is for Lemon Salt Scrub, brought to you by Kitchen Misfit. Check out her stuff because she has more recipes for you guys! I love a good lemon scent because it is so fresh! A salt scrub is used to exfoliate dead skin from your body, leaving behind fresh, nourishing skin enriched with herbal ingredients. Stay fresh ladies!!

Lemon Salt Scrub
Ingredients
- 4 parts coarse sea salt (I used 1 cup)
- 1 part safflower oil (I used 1/4 cup. You may use any kind of non-smelly oil such as olive oil, sunflower oil, or sweet almond oil)
- Zest of one lemon
- 1 tsp lemon extract
Directions
- Combine all ingredients in a medium sized bowl with a spatula. Make sure that no water comes in contact with any of the ingredients, as it will cause the salt to dissolve
- To use, after showering, apply a tbsp or two on body. After a few minutes, rinse with warm water.
Candy Cane Sugar Scrub
Mmm....Candy canes & sugar. This will be hard not to eat! ha! This is brought to you by The Natural Beauty Workshop!! They're wonderful! A sugar scrub is used to nourish and moisturize your skin so it is baby soft! They usually make you smell delightful as well! This Candy Cane sugar scrub is perfect for the holidays! Enjoy!...And even though it looks yummy, please don't eat it! :)

Candy Cane Sugar Scrub
Ingredients
1/2 cup Shealoe Butter*
10 tablespoons Granulated White Sugar
1/2 teaspoon Red Jojoba Wax Beads
2 teaspoons White or Pale Yellow Beeswax
1/2 teaspoon of Peppermint Essential Oil** or Fragrance Oil
Directions
To create a duo-colored scrub, like the one pictured, you'll need two small mixing bowls. Add 5 Tablespoons of sugar to each bowl. In a double boiler, melt 1 teaspoon of white beeswax completely. Next, add 1/4 cup of Shealoe Butter to the double boiler and turn the burner off. Be careful to warm the Shealoe Butter very gently. Overheating Shealoe Butter can cause it to separate. When it has melted completely, stir the butter and wax mixture into one of the bowls of sugar. Next, add 1/4 teaspoon of fragrance or essential oil to the bowl and stir. Add 1/2 teaspoon of Red Jojoba Wax beads and mix well. Pour the mixture into a resealable bag. Repeat this process with the second bowl of sugar, this time, leaving the Red Jojoba Wax Beads out of the mixture. To make the piping easier, refrigerate the bags of scrub for ten-fifteen minutes. When the scrub is ready, roll one bag's contents into the corner of the bag and cut the
 corner.Just
like piping icing onto a cake, pipe your scrub onto the walls of a
clear jar. This may take some practice, but even if you're lines aren't
perfectly straight, it should create a lovely effect. Repeat this step
with the second color of scrub. When the walls are covered, pipe the
remaining scrub into the center of the jar in whatever style you prefer.
corner.Just
like piping icing onto a cake, pipe your scrub onto the walls of a
clear jar. This may take some practice, but even if you're lines aren't
perfectly straight, it should create a lovely effect. Repeat this step
with the second color of scrub. When the walls are covered, pipe the
remaining scrub into the center of the jar in whatever style you prefer.This scrub can also be made in one color. This is a little easier, but it still looks lovely. Instead of mixing two separate bowls, as described above, simply mix all of your ingredients in one bowl and spoon into a clear jar!
Packaging, Usage & Preservation
A natural or synthetic preservative may be added to this recipe at your own discretion. For information on preservatives, please visit our informational library. Without a preservative, this product should be used up as soon as possible, ideally within 3 weeks. If it not preserved, or if it is preserved with a natural agent, please handle this product with care. Keep the jar closed and in a cool, dry area. Do not bring the jar into the shower or bath. Instead, use a clean spoon or popsicle stick to scoop single portions into a paper or plastic cup.
This beautiful scrub looks great in a clear container. Try a PET jar to show it off!
Directions
There are many scrubbing techniques out there, but this is one I am particularly fond of. Step into the shower and before turning the water on, scrub your body all over! (Of course, avoiding very sensitive areas or broken skin.) When you are thoroughly scrubbed, turn the shower on and rinse. When the shower is over, make sure to moisturize your skin with a body oil, cream, or lotion.
*This scrub yields about 4 ounces of scrub. However, you may lose some product in the piping bags. To ensure that you make enough to completely fill a jar, you may want to add 1-2 extra tablespoons of Shealoe Butter to this recipe.
**Peppermint Essential Oil should not be used around babies and small children.
Hand-made sparkly strawberry lip balm
This lip balm is brought to you by Torie Jayne, who is a lip balm genius, I must say. Personally, I need a chapstick or lip balm wherever I go. Not only does it moisturize your lips, but it just looks cute. I'm not a fan of colored stuff because I hate getting it on my teeth, and if I look like a bum on the street, I don't want to have a fancy lip color on (it might give the wrong idea). So try this cutesy lip balm for yourself and make it for your friends too!

Christmas gift : Sparkly strawberry lip balm
Ingredients
- 2 tablespoons of white beeswax pellets (plus 1/2 tsp for the deer toppers)
- 4 tablespoons sunflower oil (1/2 tsp for deer)
- Few drops of strawberry essential oil
- Edible pink glitter
- Lipstick shavings
Packaging
- 6 small acrylic pots
- P1 address labels
- pink washi tape
- Self adhesive clear film
Equipment
- Mini deer mould
- Pipettes
- Microwavable glass jug
- Microwavable small glass jar
- Metal spoons
- Scissors
- Sharp knife

Sparkly strawberry lip balm, How-to step by step

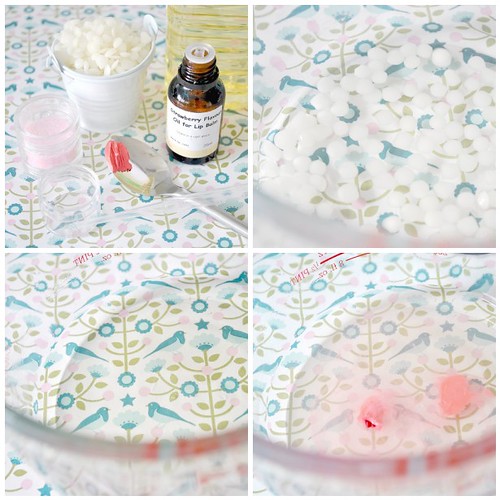
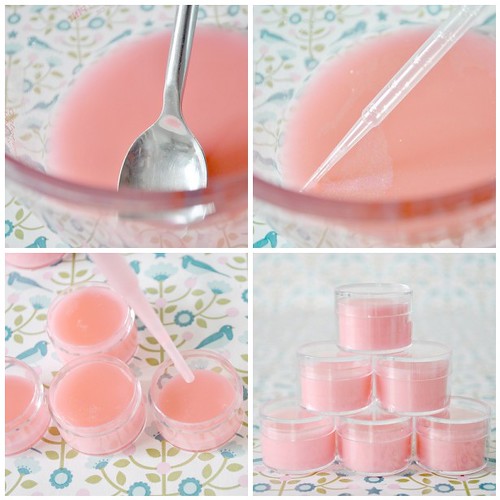
Start by placing the beeswax pellets and oil in a glass jug in the microwave. Heat on low to medium power until the beeswax pellets have melted. Remove jug from microwave and stir with a metal spoon. Using a pipette, add a few drops of strawberry oil.

Gradually add lipstick shavings to the jug of liquid. Stir mixture with metal spoon and continue adding lipstick shavings until you achieve desired shade and the colour is even. Using a clean pipette, transfer lip balm to pots.

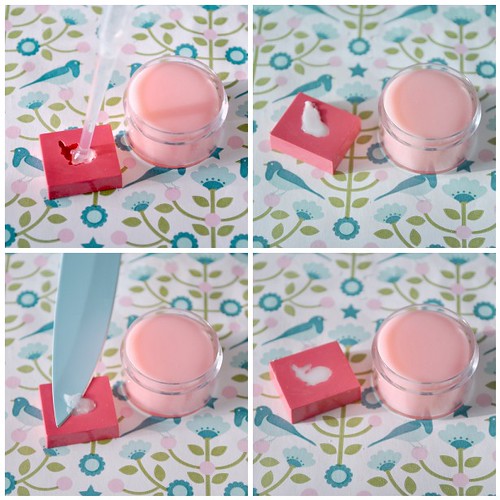
In a small glass pot, melt half a teaspoon of beeswax with a teaspoon of oil in the microwave until beeswax pellets have melted. Add a drop of strawberry oil and stir with a metal spoon. Using a clean pipette, fill deer mould with lip balm. As soon as the lip balm cools and turns white, use a sharp knife to remove excess from back. Wait a minute then turn out deer on to top of pink strawberry lip balm. Repeat until all strawberry lip balms have a white deer atop. Leave to set for one hour.

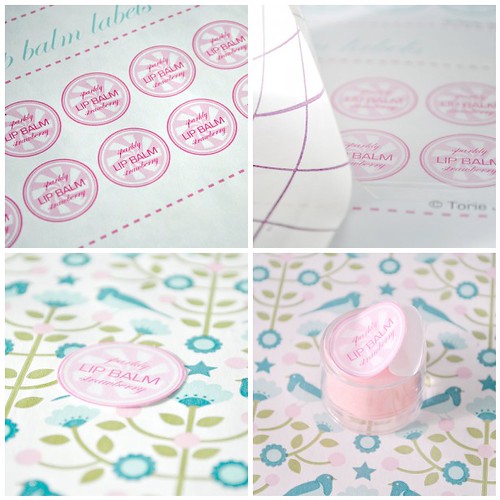
Wrap washi tape around each jar to secure lids.

Lovely

No comments:
Post a Comment