
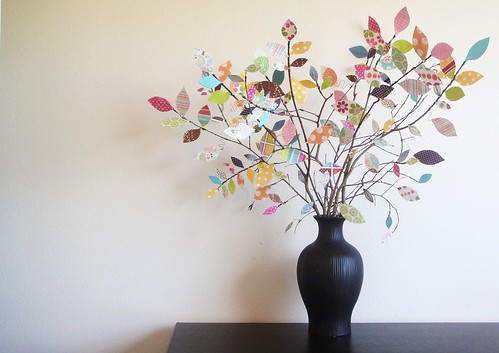
This simple project uses scrapbook paper leaves to create a bright and cheery Spring ambiance for your home. You could also use these beautiful trees in a wedding, baby shower, bridal shower, birthday party... the possibilities are endless!
What You Will Need:
Scrapbook paper
Branches
Floral Wire (I used 24 gauge wire)
Glue (You can use scrapbook or tacky glue, but I just used good ole Elmers)
Scissors
Cardboard/cardstock/chipboard
Vase or Pot to place your branches in
Newspaper
The awesome thing is - you probably already have most of these supplies on hand. I only had to purchase the floral wire for a little over $1 (with a coupon). What an inexpensive way to bring Spring into your home!
Let's Get Started:
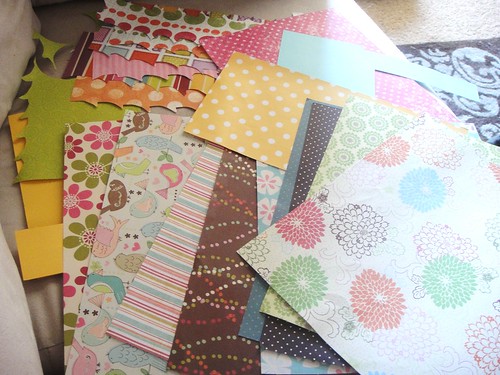
First, drag out your
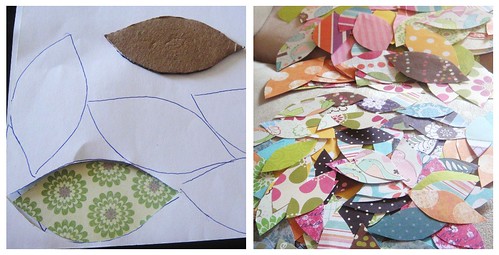
Cut out a template of your leaf from the cardboard (you can also use chipboard or card-stock). I used two different sizes of leaves - one small and the other a lot larger. Try to make the leaves as symmetrical as possible (which I did not realize until later). This will help with pairing up a back and front leaf later on. Using your template, cut out as many leaves as you want. Cut them in even numbers because, again, you will be pairing them up later on.
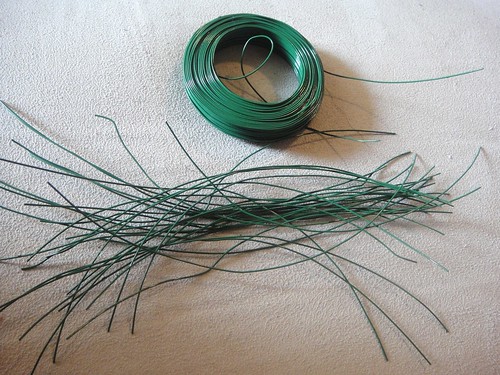
Take your floral wire and cut strips anywhere from 5"-8" long. I know that's a big range, but I'm taking into account the different size leaves. If it's a larger leaf, you will want a few extra inches of wire.
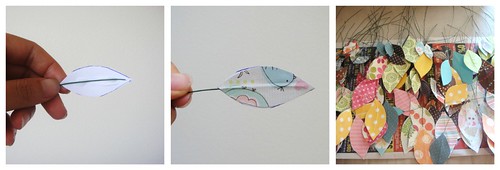
Lay down some newspaper next to your workspace. Take one of your leaves and put a thin strip of glue down the center. Place a piece of wire on the glue. Find a leaf of the same size and same scrapbook paper (or different paper- this is your project!) and place it on top of the glue, sandwiching the wire and forming a "vein" down the center of the leaf. Place your newly made leaves on the newspaper. Keep going until you've made all of your leaves.
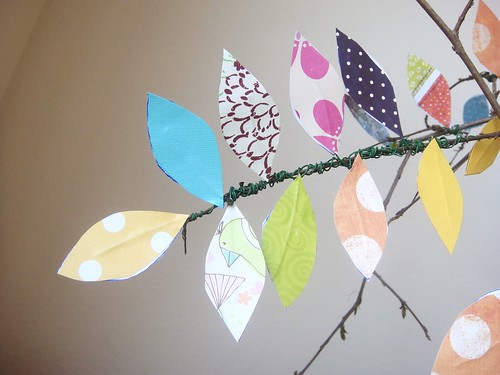
Now for the fun part! Start placing your leaves on your tree by wrapping the floral wire around a branch. You can arrange them in a natural way (as pictured above)...
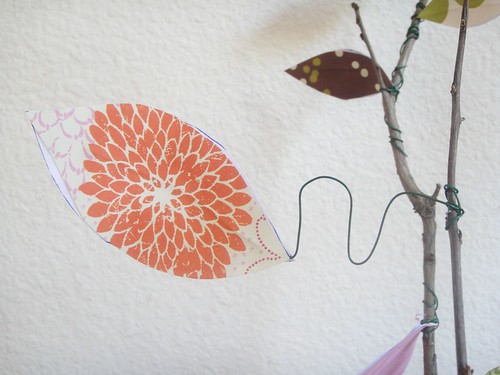
...or make them funky.
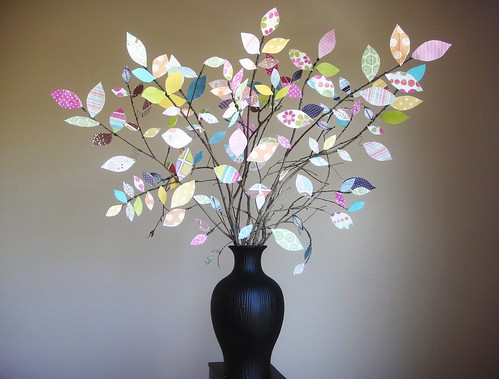
And you're done! This project is so easy. You can make a huge tree or just make a small, simple one. Do ten of them for an event, or just create one for your humble abode. Either way, take this idea and run with it. You can create some Spring magic using only a few supplies!
That would be so cute for a nursery or for a baby shower. Other more neutral colors would make it great for a living room or something, unless you love bright colors then this is just fine for a living room! Awesome you found this, I'm definitely going to do it some day. Good luck with the house hunting!
ReplyDelete-Mar
http://girlinawholenewworld.blogspot.com/
This is the cutest thing ever!! I think I'm going to try it this weekend!!
ReplyDelete